Grey cards. 50% of the frame.
Most people probably think colour temperature is a minor detail, one of those things you set and forget. Dial in 5600K, maybe 3200K, make sure it looks about right, and crack on. It RAW or Log right. Simple. Except it isn’t - at least not for me. I’m a specialist, I’m hired to care deeply about the images I help create, and yeah, not everyone cares to that levels and thats ok. But if you’re still here, reading this, I’m guessing you care to.
This is where most people tune out. But for the obsessives—the ones who lie awake at night thinking about how different LEDs drift into magenta hell, or how one camera’s 5000K never quite matches another’s—this could be a helpful little quality of life hack.
Just to clarify, this isn’t a post about matching lights—that’s another rabbit hole I’m waiting to dive into once my new LIT Systems light and colour meter arrives (a single meter for both? Yes, please). No, today we’re talking about that often overlooked but essential step in cinematography: white balance.
Why Manual White Balance Matters
Light is rarely perfect. Even when it looks good to the naked eye, your camera’s sensor might not agree. Daylight isn’t just daylight; it shifts, it changes. Tungsten isn’t always 3200k, bulbs age and LED lights—well, some of them have a mind of their own. Different cameras interpret colour temperature differently, which means if you’re shooting with multiple bodies, relying on presets isn’t always going to cut it.
Of course, there’s the old argument: “I’ll just fix it in post.” But that’s like saying, “I’ll season the dish after it’s cooked.” Sure, you can, but wouldn’t it be better if it was right from the start? A clean white balance saves time, keeps skin tones looking human rather than radioactive, and gives you more control over your final image. But I get it, there isn’t always time and a manual white bar;ance can be a real pain the arse.
The Tools of the Trade
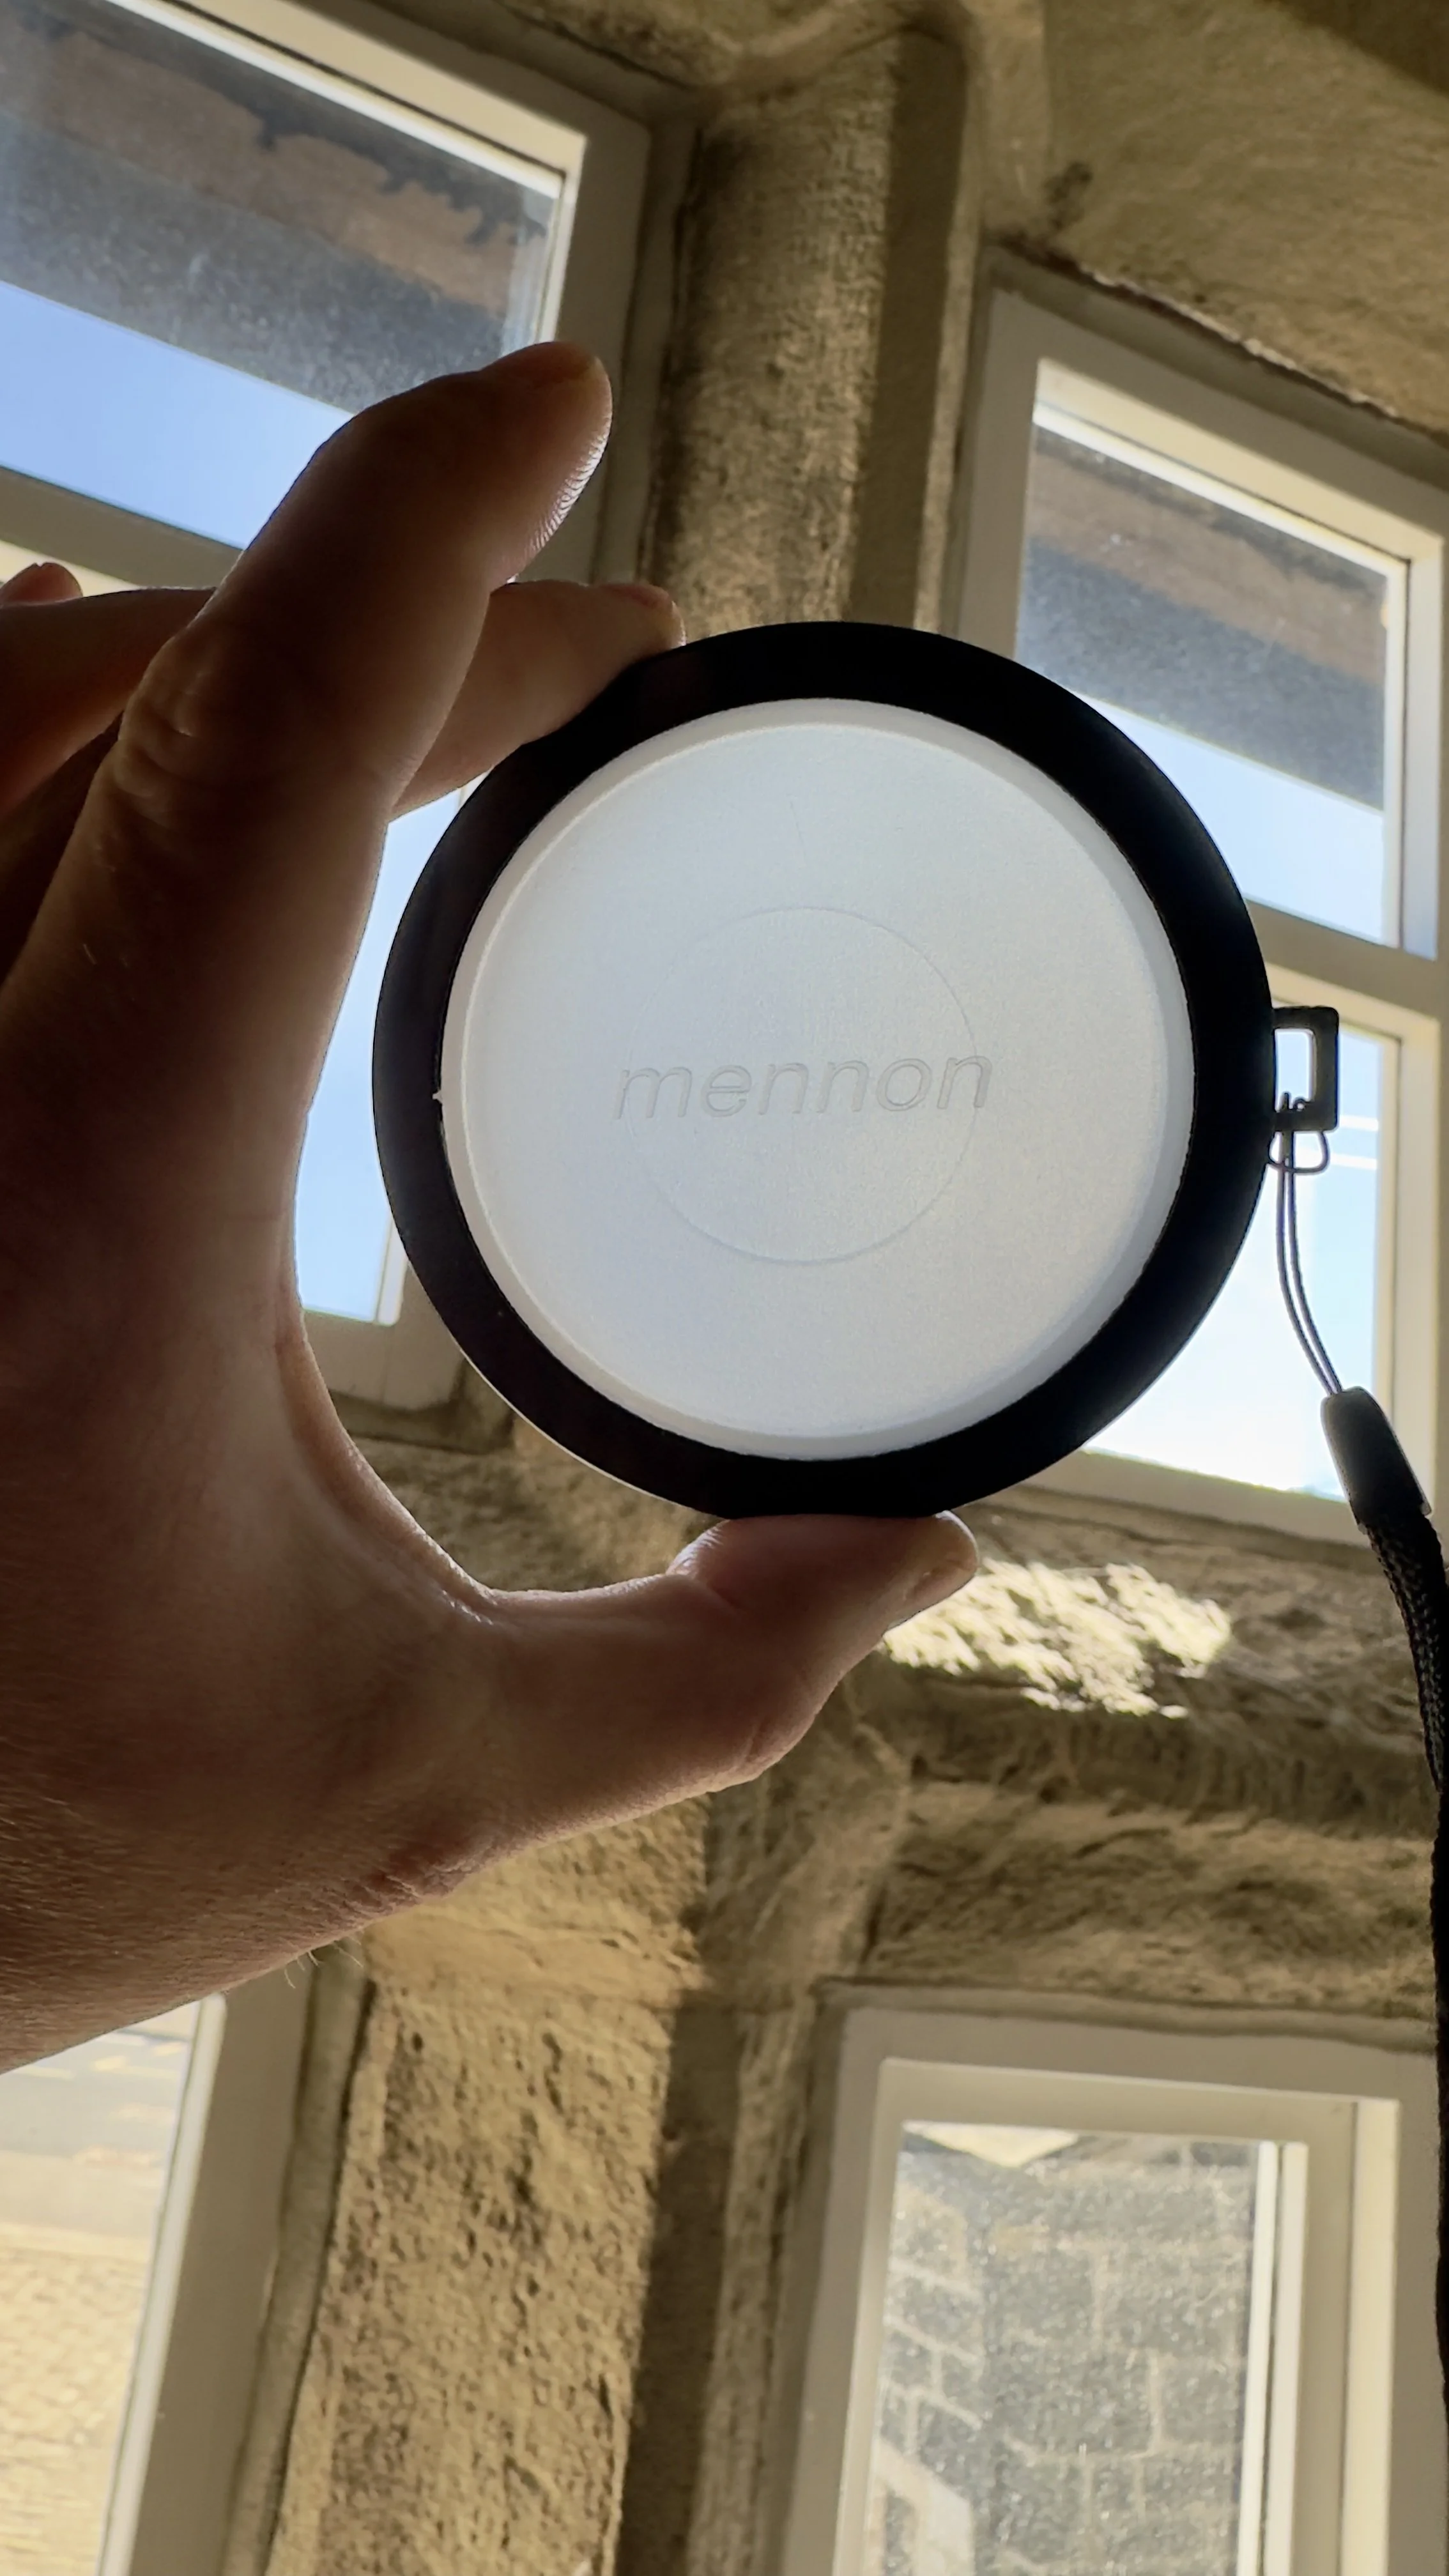
White balance lens cap
A proper colour meter will tell you exactly what you’re dealing with. Sony FX cameras (and plenty of others) let you manually input the temperature, and that’s a solid start. But a colour meter is expensive and another meter to hunt around the set for.
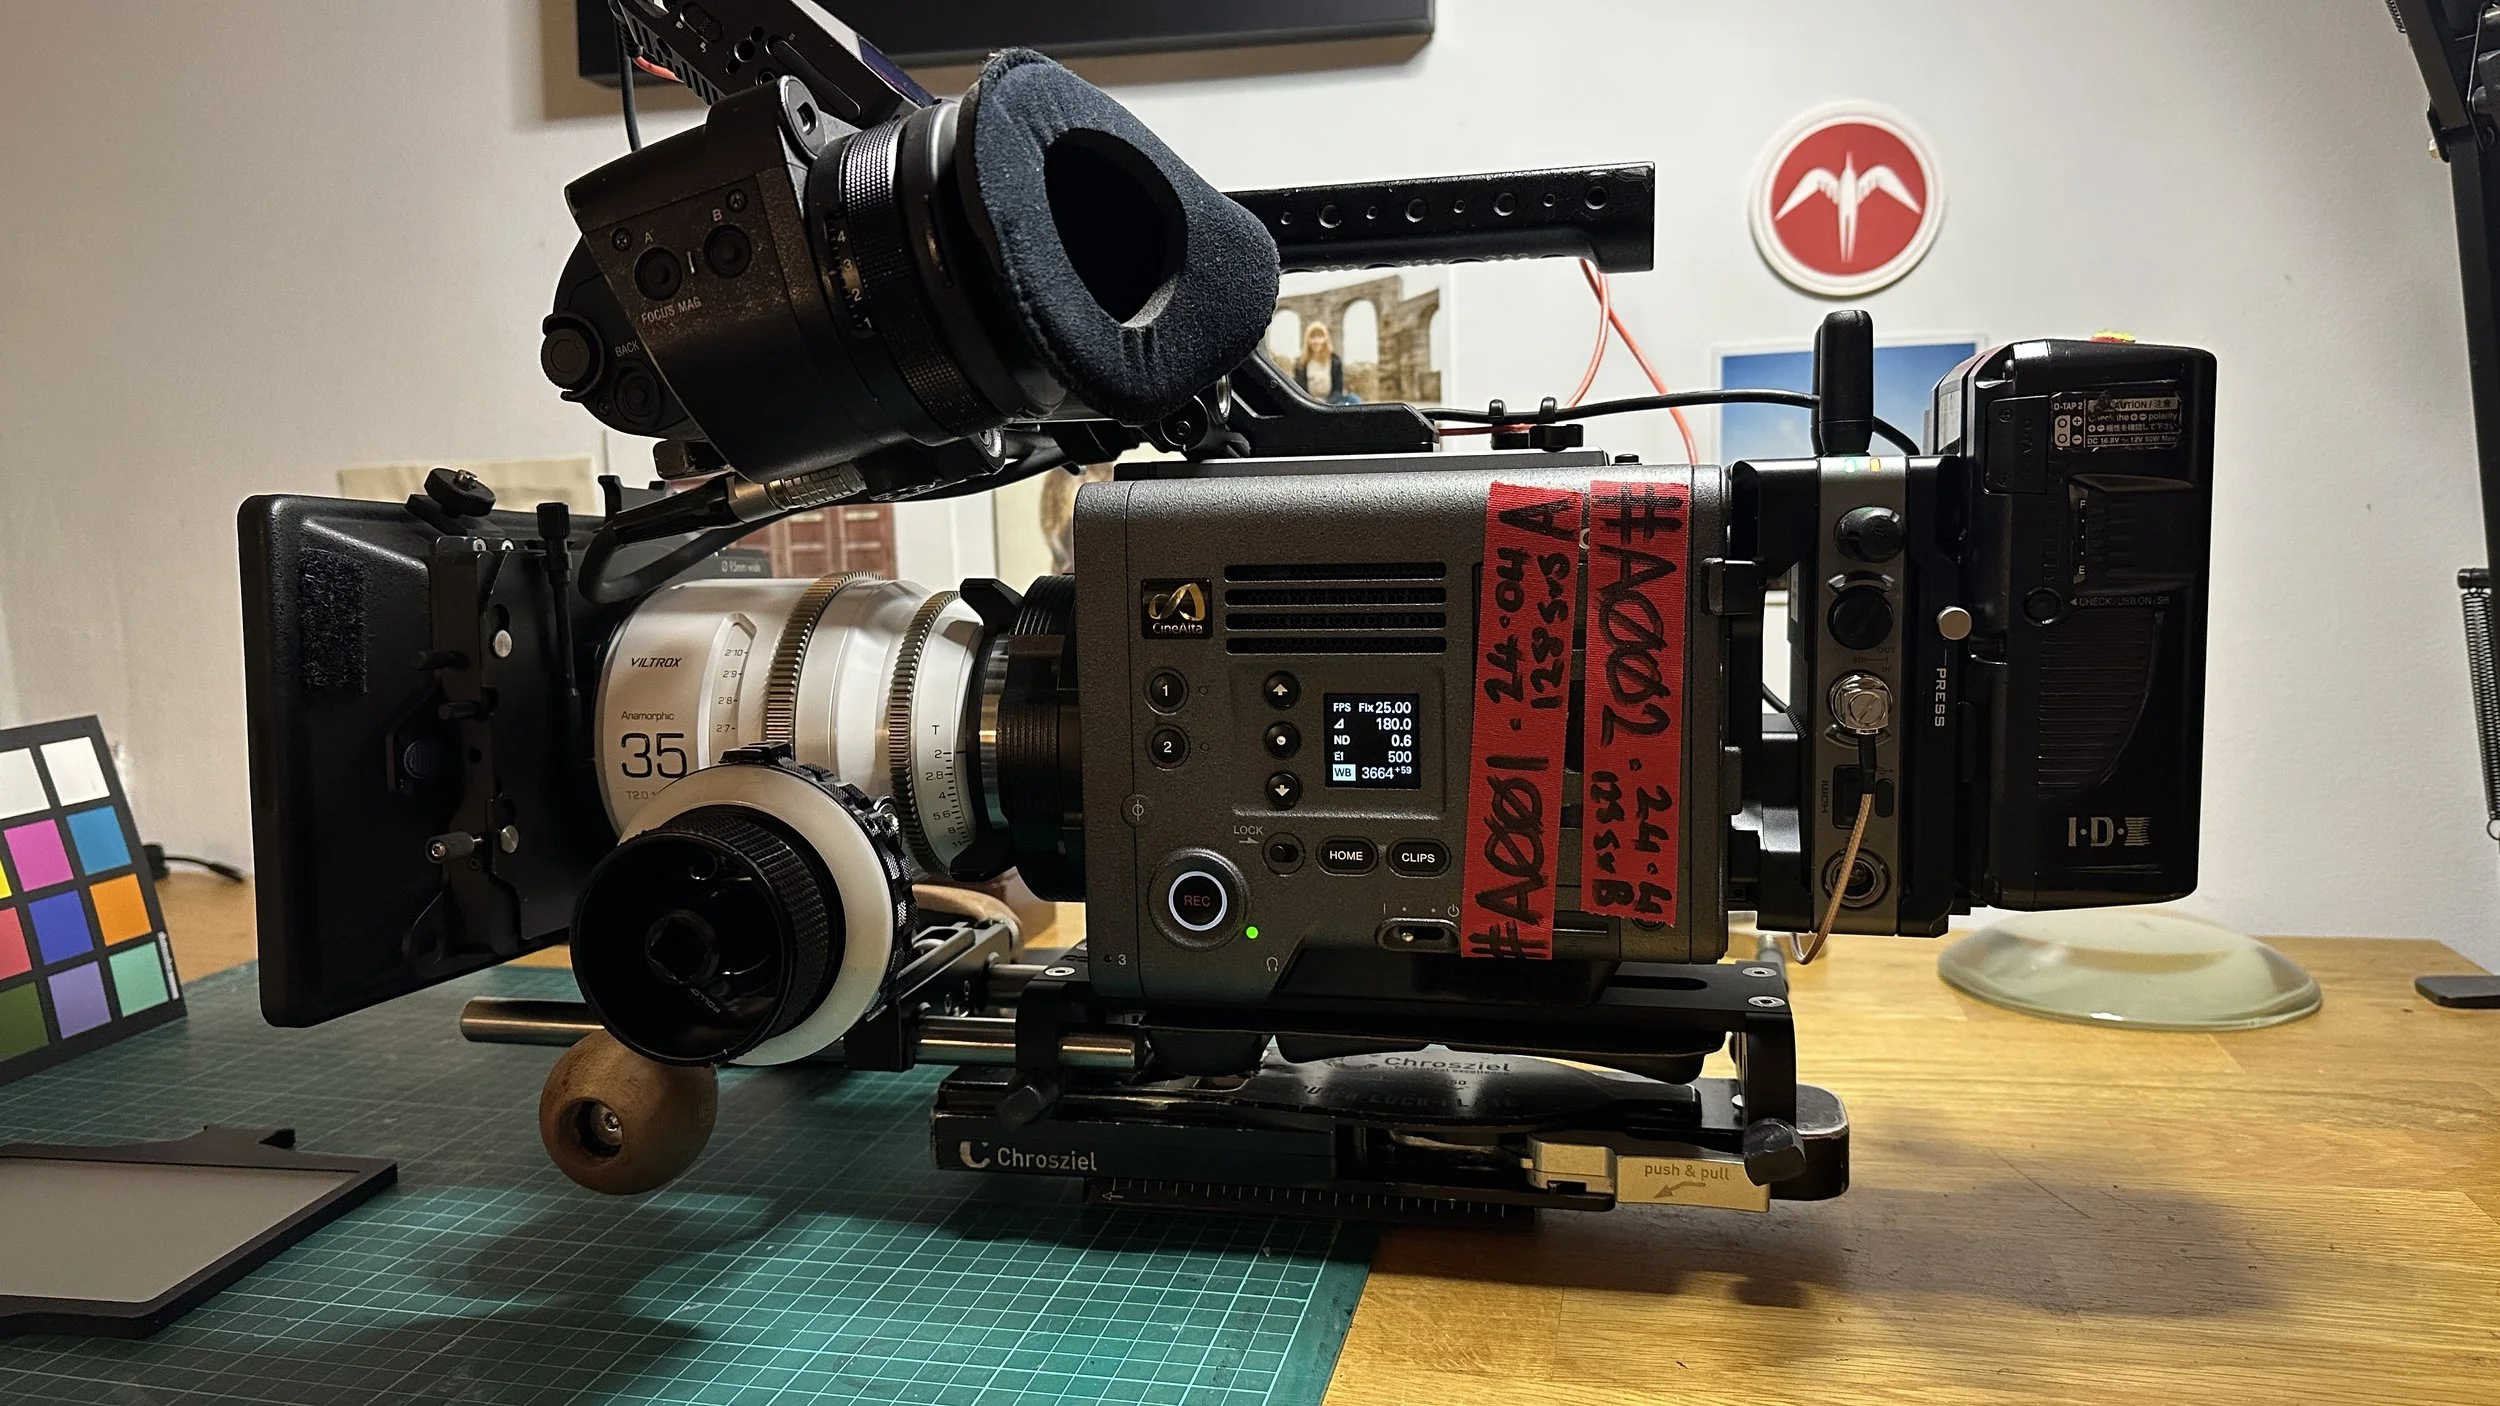
Being old school and coming up in docs—I still bring a grey card with me. There’s something reassuring about pointing a camera at a neutral reference, locking in the balance, and knowing it’s solid. Except, of course, that it’s not always practical. Some cameras—FX6, FX9, Venice—need the card to fill the frame, well technically the white card should be placed so it is within the scene you are shooting and it needs to fill at least the center 50% of the frame. This can be a pain when you’re on a prime lens or in a fixed camera position. DSLRs and FX3 users get the luxury of sampling a smaller area, but for the rest of us, it’s either shuffle forward with the camera or move the entire setup. Clunky. Not ideal.
Which is why I started experimenting. First, a white balance lens cap—one of those semi-transparent covers you slap on the front of the lens, letting ambient light pass through while the camera does its thing. It’s quick, efficient, and for the most part, works ok. But it’s still not perfect. On a recent shoot for the supermarket Lidl, in a busy school where sickly yellow overhead fluorescents clashed with giant daylight windows—it helped match the Venice and a colleagues FX9 reasonably well. But the cap is 77mm and designed for DSRL lenses, not cine,a lenases, and since I mostly use a clamp-on Arri matte box, I was open to a better solution.
Enter a 4x5 frosted piece of Perspex .
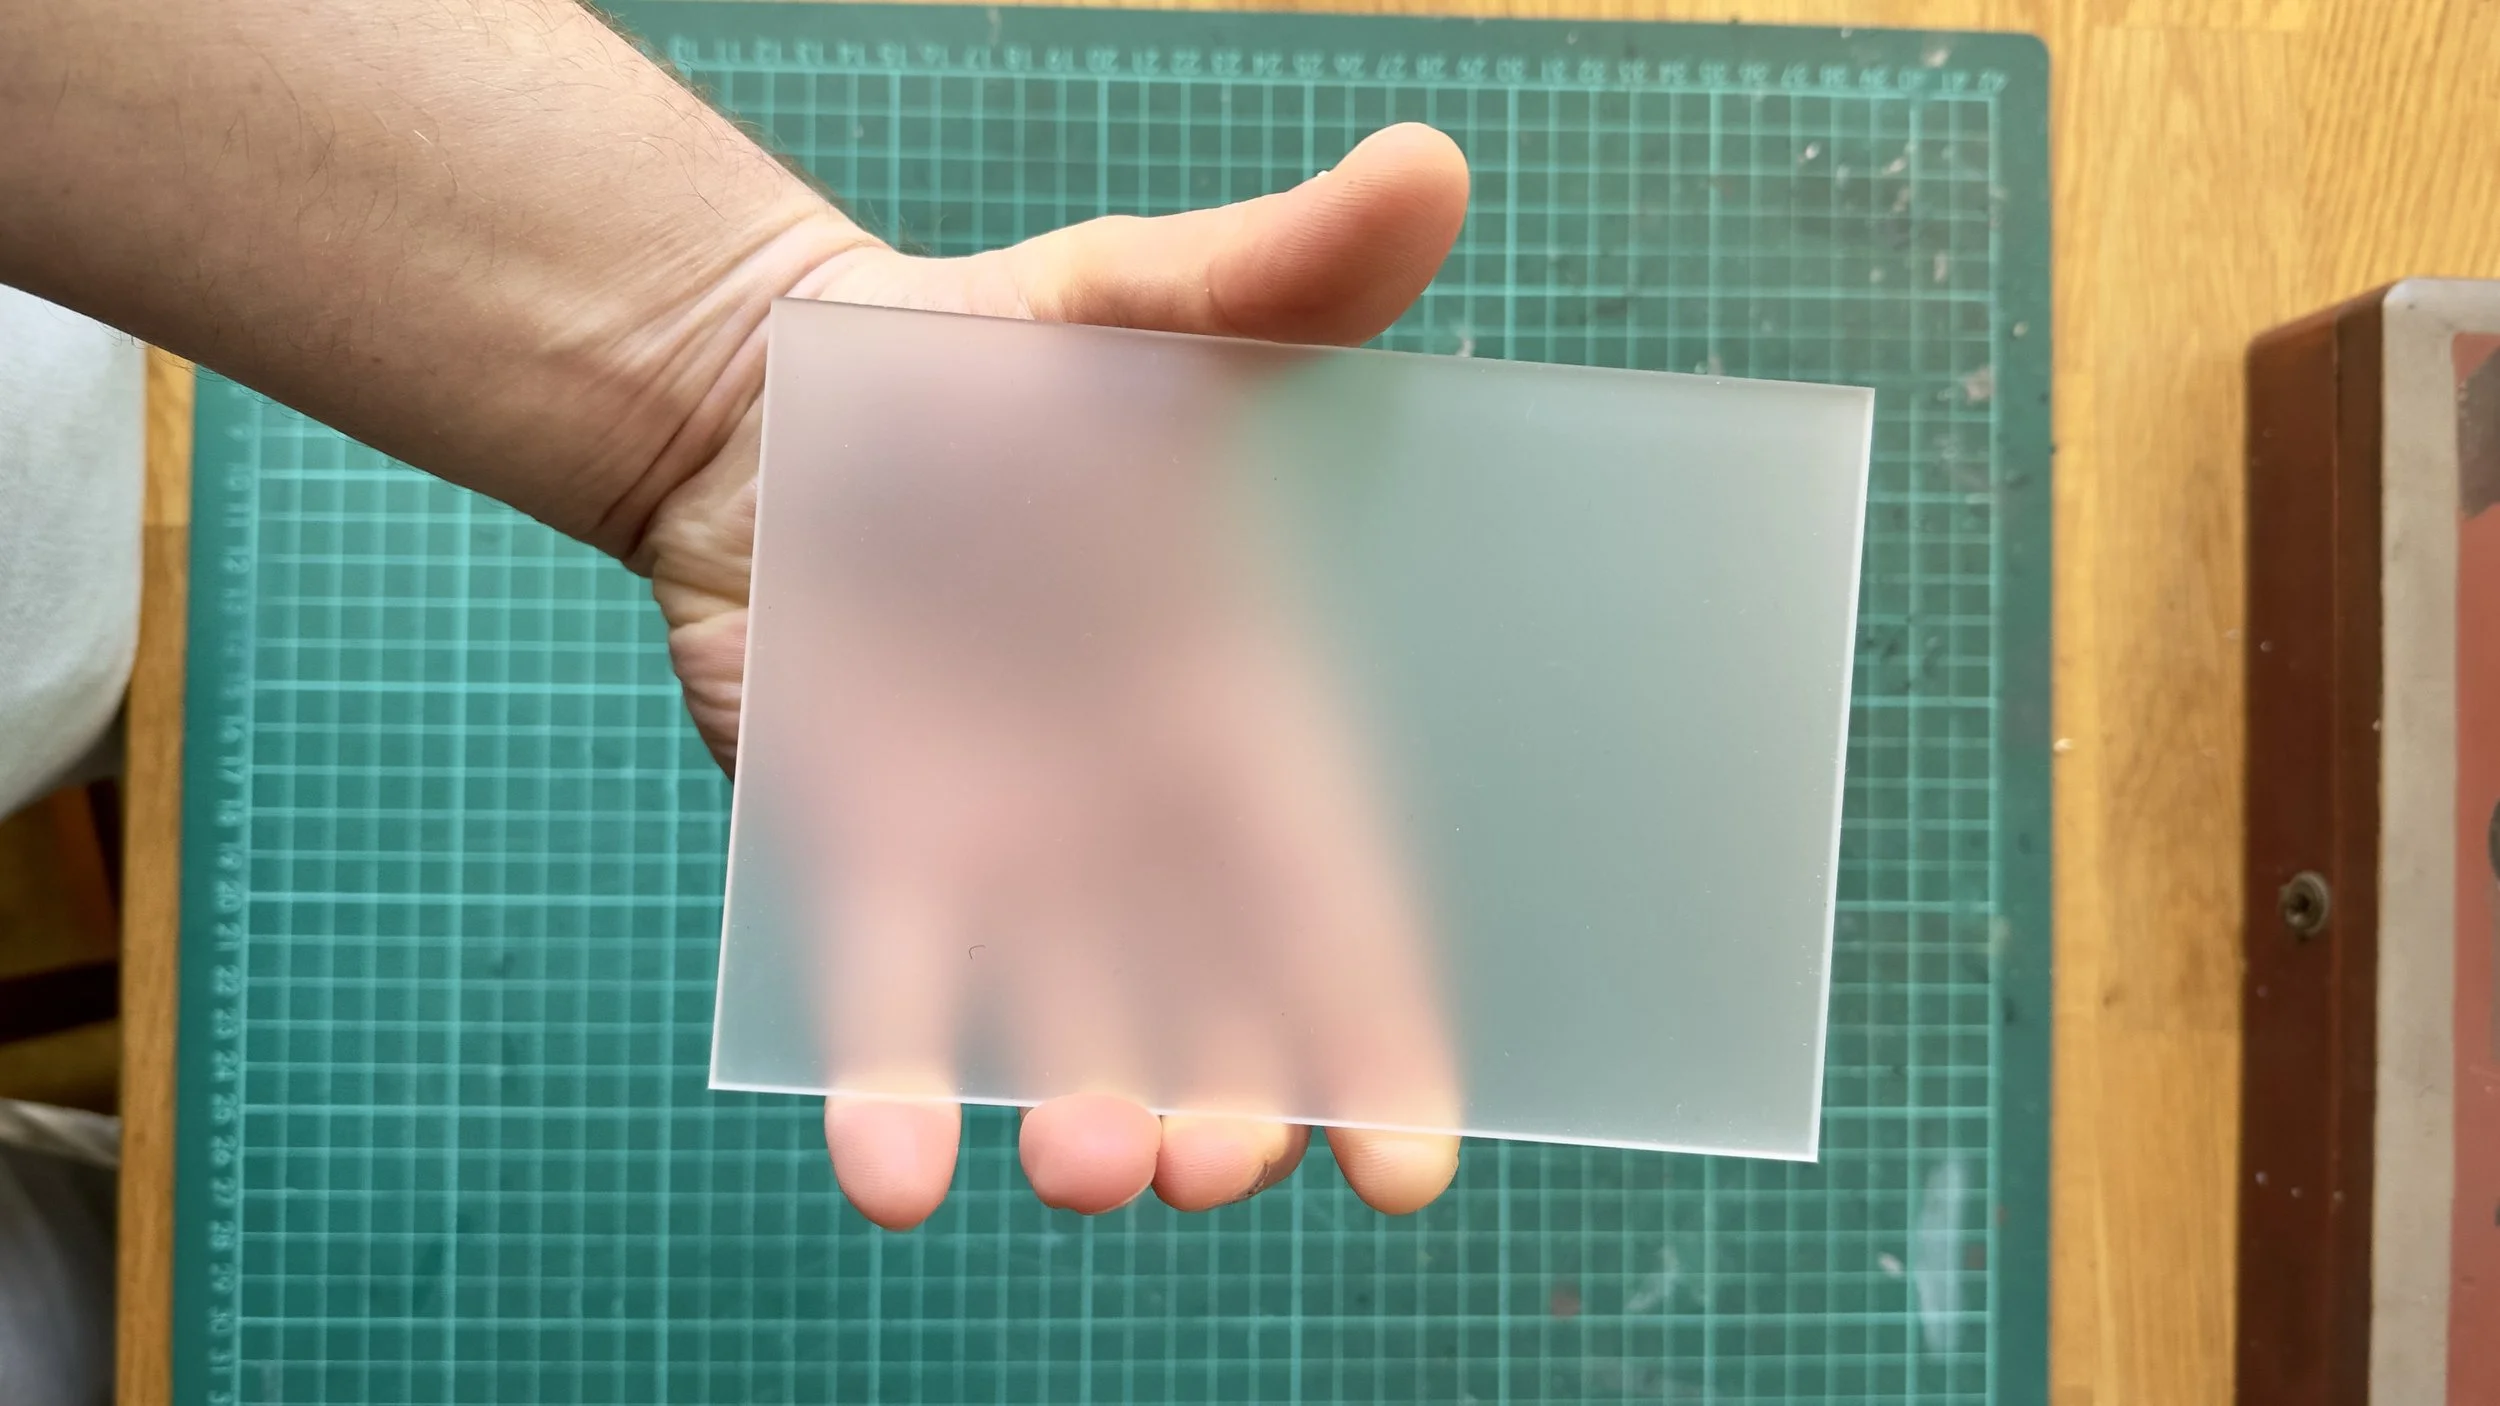
4×5 Frosted Perspex
The 4x5 White Balance Hack
So stay with me, this is a little but Heath Robinson but so far it works and makes a difference. A simple 3mm dark grey tinted Perspex sheet, when exposed at middle grey, so far functions better than the lens cap method. It lives in a 4x5 matte box tray, so when I need to white balance, I just drop it in, take a reading, and remove it. Easy. Reliable. And—because I know some of you will ask—cheap! About £6 including shipping.
I picked mine up from www.perspexsheet.uk - no affiliation other than they offer a custom sizing service (it’s the 6600 Perspex Sheet, if you’re curious). So far I have tested it against a grey card and the lens cap, and honestly, it holds up. Some very basic results are below, and I plan on a more rigorous test against a grey card in different lighting situations at a later date.


Like I said at the start, to some, this could all seem like a waste of time and the point is a little mute if you are using a colour meter. But to me, these little hacks allow me to deliver the best image I can to the director, client, whomever. Even if the impact is minimal and of course, we could get to this result quickly in post, yet I feel that as a professional hired to create images, it’s my responsibility to at least consider the issue of white balance and do something proactive where I can. If you’re the one responsible for making the image work, why not take the extra step if you have the time?
It’s not glamorous. It’s not the kind of thing that wins awards. But when everything looks right straight out of the camera? That’s the difference between someone who sets and forgets, and someone who actually gives a damn. And if you’ve read this far, you probably do to!

LMB 4×5 Tray